IKEA stool hack
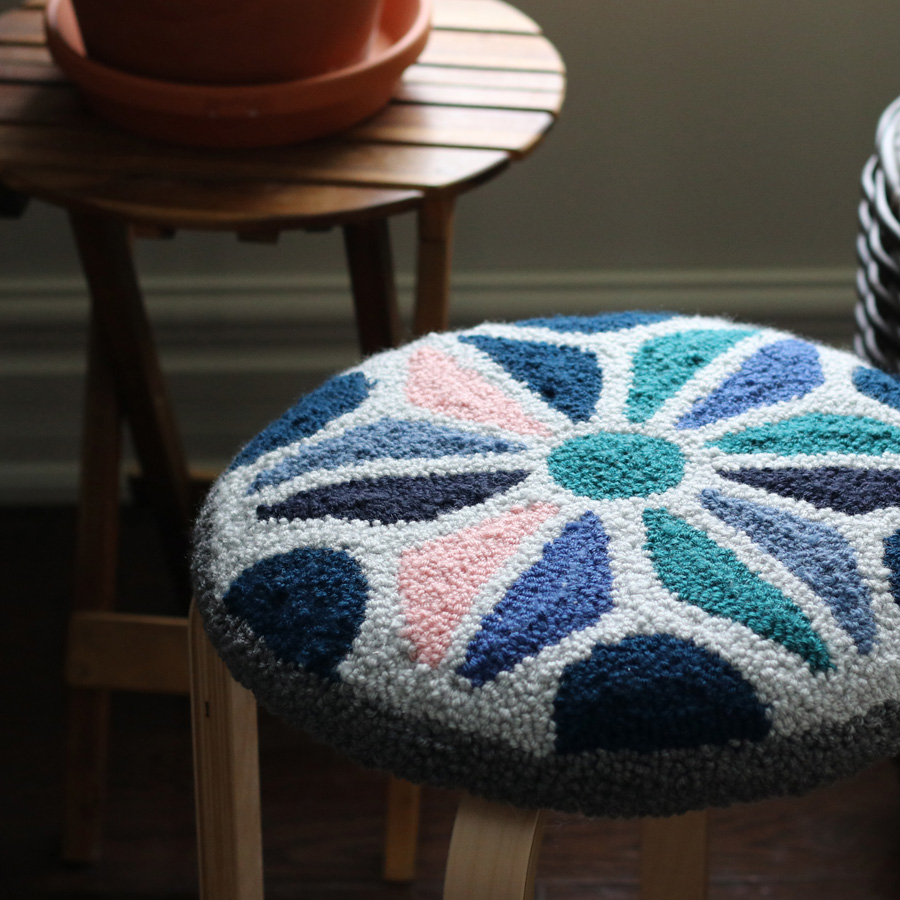
I was in need of a chair/stool to use in my bedroom at my "getting ready" desk. My semi-permanent solution was to use an older dining room chair (you know, the leather ones you bought prior to owning cats and then realizing how much of a bad idea that was), and while browsing Instagram I came across a fab IKEA stool hack. I made my own using the FROSTA stool and my own punch needle pattern.
Materials
IKEA FROSTA stool
IKEA CILLA chair pad
Material to cover the chair pad. You can use my pattern to punch your own.
Staple gun
Hammer
Hot glue gun
Instructions
Take the seat and trace a circle on the material you are using to cover it. The seat itself measures 13 3/4", add extra to cover the thickness of the seat (about 1") plus 2" to fold over and staple.

Sandwich the pad between the seat and cover ensuring you have enough material to cover them.

Hold the fabric taut and fold over the excess. Staple as many times as you need to making sure you are pulling tight all the way around.

Once you've stapled all the way around, cut the excess fabric. Note: this is the easy way to do this. You can get fancy and do a pull string cover or even do elastic. Let's be honest, for the price of the stool I could just make a gazillion seats and well, who has the time to sew? I have toddler twins and many things on the go. Not happening. Very little chance of someone flipping this stool around to judge my craftsmanship.
I used the hammer to seat the staples (fancy term my husband taught me) aka hammer down the staples.

Install the legs with the little tiny Allen key they give you. Make sure you've either cut your fabric enough to not cover the screw holes or that you can go through it with the screw. I went through some of it without any issues.

The last step is to glue gown the extra fabric with your good old hot glue gun. You can use a fancy textile or wood glue but the hot glue worked just fine for me.

That's it! You've created your very own custom stool. It's an unfinished stool so you can get fancy and stain it or paint it to suit your decor :) (Obviously do this before you attach the legs). Enjoy!
